


As the weather in Searcy, Arkansas starts to cool down, it’s time for us to think about getting our homes ready for winter. One of the most important parts of this is making sure our heating systems are in good shape. Proper hvac winter preparation Searcy Arkansas can save us from a lot of trouble when the cold really hits. We’ve put together some simple steps to help us get our HVAC systems ready.
Key Takeaways
- Schedule a professional check-up for your HVAC system before winter arrives. A technician can spot small problems before they become big ones.
- Change your air filters regularly. Clean filters mean your system works better and uses less energy.
- Look for and fix any leaks in your air ducts. This will make your home warmer and more comfortable.
- Set your thermostat correctly. Using a programmable or smart thermostat can help save on heating costs.
- Clear away any leaves or branches from your outdoor unit and make sure it can drain water properly.
Schedule Professional HVAC Inspection
Before the real cold hits Searcy, it’s a good idea to get our heating systems checked out by a professional. We often wait until something breaks, but that’s usually when it’s coldest and most inconvenient. Scheduling an inspection now can save us a lot of headaches later.
Importance of Annual Check-ups
Think of it like taking your car in for its yearly service. Our home’s heating system works hard all winter, and just like a car, it needs regular maintenance to keep running smoothly. An annual check-up helps catch small issues before they turn into big, expensive problems. It’s about preventing breakdowns when we need our heat the most. This proactive approach means fewer emergency repair calls during a cold snap, which are often more costly and harder to schedule.
What a Technician Checks
When a technician comes out, they’ll go through a list of checks. They’ll look at the furnace itself, checking the heat exchanger for cracks, cleaning out dust and debris, and making sure all the electrical connections are secure. They’ll also test the thermostat to make sure it’s working right and check the refrigerant levels if you have a heat pump. The blower motor and fan will be inspected for wear and tear, and they’ll test the overall system operation to see if it’s heating your home efficiently.
Benefits of Early Detection
Catching problems early is the main benefit. A small crack in the heat exchanger, for example, might not cause immediate issues, but it can leak carbon monoxide, which is dangerous. A technician can spot this during an inspection and recommend a repair or replacement. Other common issues like dirty burners or a failing capacitor can also be identified and fixed before they cause the system to stop working entirely. This saves us money on repairs and keeps our homes safe and warm.
Clean or Replace Air Filters
We often overlook the simple things, don’t we? Changing the air filter in your HVAC system is one of those tasks that seems minor but has a big effect. A dirty filter is like a clogged artery for your heating and cooling system. It makes your furnace or air conditioner work harder than it needs to, which costs you more money on energy bills and can lead to breakdowns. We want to keep things running smoothly, especially when the Searcy winter starts to bite.
Impact on Airflow and Efficiency
When your filter gets clogged with dust, pet hair, and other bits of debris, it restricts the amount of air that can pass through. Think about trying to breathe through a thick blanket – it’s tough! Your HVAC system feels the same way. This reduced airflow means your system has to run longer to heat your home, using more electricity or gas. It also means the air in your home might not feel as warm as it should, even when the system is running. Over time, this strain can wear down components, potentially leading to costly repairs.
Frequency of Replacement
How often you need to change your filter really depends on a few things. If you have pets, especially shedding ones, you’ll probably need to change it more often. Also, if you have allergies or live in a dusty area, more frequent changes are a good idea. For most homes, checking the filter monthly and replacing it every one to three months is a good rule of thumb. Some high-efficiency filters can last longer, but it’s always best to check the manufacturer’s recommendations and visually inspect the filter.
Here’s a general guideline:
- Standard Fiberglass Filters: Check monthly, replace every 30 days.
- Pleated Filters (MERV 6-8): Check every 1-2 months, replace every 3-6 months.
- High-Efficiency Filters (MERV 9+): Check every 3-6 months, replace every 6-12 months.
Choosing the Right Filter
When you go to buy a new filter, you’ll see a lot of options. The MERV rating (Minimum Efficiency Reporting Value) is important. A higher MERV rating means the filter is better at trapping smaller particles like pollen and smoke. However, a very high MERV filter can sometimes restrict airflow too much for older HVAC systems. For most homes in Searcy, a MERV rating between 8 and 13 is usually a good balance between filtering out common allergens and maintaining good airflow. Always check your HVAC system’s manual or consult with a professional if you’re unsure which type of filter is best for your specific unit.
Keeping your air filter clean is one of the easiest and most effective ways to keep your heating system working well all winter. It’s a small task that saves you money and hassle down the road.
Inspect and Seal Air Ducts
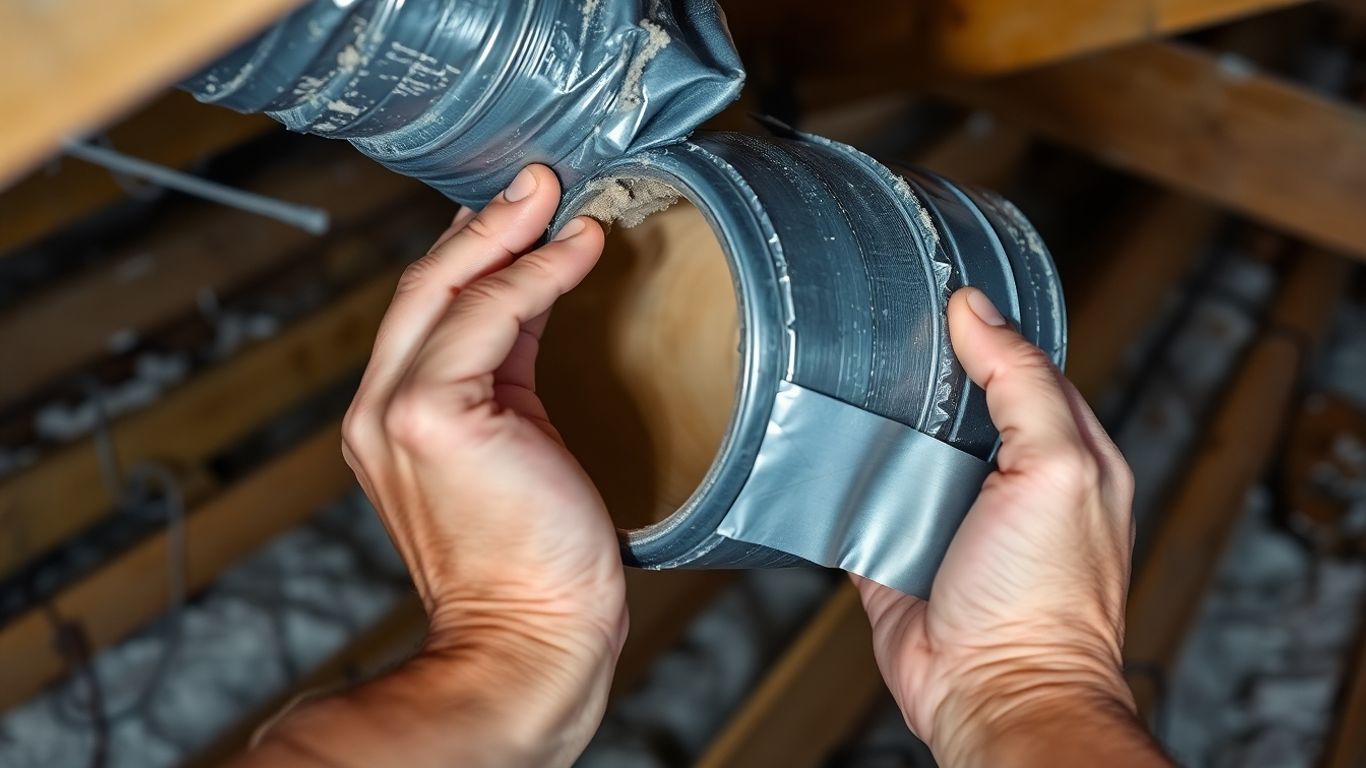
We often forget about the network of ducts that move air throughout our homes. These hidden pathways are really important for how well our heating and cooling systems work. When they have leaks, it’s like leaving a window open when the heat is on – a lot of that warm air just escapes before it even gets to the rooms where we need it.
Identifying Leaks
Finding leaks in your air ducts isn’t always obvious. Sometimes you might notice uneven temperatures in different rooms, or maybe your system seems to be running more often than it should. Another sign could be dusty rooms, as leaky ducts can pull in air from attics or crawl spaces, bringing dust and other particles with them. You might also hear a faint hissing sound when the system is on, especially if the leaks are significant. Checking the connections where duct sections meet and where they attach to vents and your HVAC unit is a good place to start.
Sealing Methods for Ducts
Once we find leaks, we need to fix them. For smaller gaps, mastic sealant or metal-backed tape specifically made for ducts works well. It’s a sticky substance that hardens, creating a good seal. For larger holes or tears, we might need to use sheet metal patches along with the sealant. It’s important to use the right materials; regular duct tape, the kind you use for packaging, won’t hold up over time and will likely peel off, especially with temperature changes.
Improving Home Comfort
Sealing up those leaks makes a big difference. When our ducts are sealed properly, the warm air from the furnace can travel directly to the rooms without getting lost. This means your home heats up more evenly and efficiently. You might find that you don’t need to turn the thermostat up as high to feel comfortable, which can save us some money on our energy bills. Plus, better airflow means your system doesn’t have to work as hard, potentially extending its lifespan. It’s a simple step that really pays off in comfort and savings throughout the winter.
Check Your Thermostat Settings
Programmable Thermostat Benefits
We often overlook our thermostat, but it plays a big role in how comfortable our homes are and how much we spend on heating. If you have a programmable thermostat, now’s the time to make sure it’s set up right for the colder months. These devices aren’t just fancy gadgets; they can actually save us a good chunk of money on our energy bills. By setting it to lower the temperature when we’re asleep or away, we’re not heating an empty house. It’s a simple change that makes a difference.
Optimizing for Energy Savings
To get the most out of your heating system this winter, think about how you use your home. Do you spend most of the day at home, or are you out for work or school? Adjusting your thermostat’s schedule to match your routine is key. For instance, you might set it a few degrees lower when you’re out during the day. Then, have it warm up a bit before you get home. Even a small adjustment, like lowering the temperature by 7-10 degrees Fahrenheit for 8 hours a day, can cut your heating costs by up to 10% annually. Making these small adjustments can lead to significant savings over the winter.
Here’s a basic schedule idea:
- Wake-up: Set a comfortable temperature.
- Daytime (Away): Lower the temperature by 7-10 degrees.
- Evening (Home): Return to a comfortable temperature.
- Sleep: Lower the temperature again.
Smart Thermostat Features
If you’ve upgraded to a smart thermostat, you have even more options. These devices connect to your home’s Wi-Fi and can often be controlled from your phone. Many learn your habits over time and adjust automatically. Some even give you reports on your energy usage, helping you find more ways to save. If you’re not sure how to program yours or want to explore its advanced features, check the manual or the manufacturer’s website. It’s worth the effort to get it working efficiently for the winter.
Don’t forget to check your thermostat’s battery if it has one. A weak battery can cause it to malfunction or lose your settings, leading to wasted energy and discomfort.
Prepare Your Outdoor Unit
Before the real cold hits Searcy, we need to give our outdoor HVAC unit some attention. It’s easy to forget about this part of the system since it’s out of sight, but it plays a big role in how well our heating works. Taking a few minutes now can save us from bigger problems later.
Clearing Debris Around Unit
Think of the outdoor unit like a car’s radiator; it needs good airflow to work right. Leaves, twigs, grass clippings, and other yard waste can pile up around it, especially after a windy fall. This blockage makes the unit work harder than it needs to, which uses more energy and can lead to parts wearing out faster. We should walk around the unit and clear away anything that’s accumulated. It doesn’t take long, but it makes a difference.
Ensuring Proper Drainage
During the warmer months, the outdoor unit handles moisture. Even in winter, condensation can form, and if there’s ice or snow, that melts. The unit has small drain holes at the base to let this water escape. If these get clogged with dirt or debris, water can back up. This can cause corrosion or even freeze and damage the unit. We should check these drain holes and gently clear them out with a small stick or wire if they look blocked.
Protecting from the Elements
While these units are built to withstand weather, extreme conditions can still cause wear. We don’t want heavy snow or ice piling directly onto the top of the unit. Some people choose to put a simple cover on top during the coldest parts of winter, but we need to be careful. Never cover the sides of the unit, as it still needs to breathe. A simple piece of plywood or a commercial cover that allows for airflow is best. We also want to make sure any electrical connections are protected from moisture and ice buildup.
Test Your Heating System
Before the real cold hits Searcy, we really should give our heating systems a good once-over. It’s not something we want to discover is broken when the temperature drops to freezing. A little proactive checking now can save us a lot of hassle and discomfort later.
Running the Furnace Before Cold Weather
We can start by simply turning on the furnace a few weeks before we expect to need it. This isn’t just about seeing if it kicks on; it’s about letting it run for a bit. This helps clear out any dust that might have settled in the system over the summer and allows us to catch any strange smells early. If you notice any odd odors, like burning dust or something chemical, it’s a sign to get it checked out right away.
Listening for Unusual Noises
While the furnace is running, we should pay close attention to the sounds it makes. Furnaces usually have a normal operating sound, but any new noises are worth noting. This could be anything from rattling or banging to squealing or grinding. These sounds often point to specific problems, like a loose part, a motor issue, or a problem with the blower. Don’t ignore these sounds; they’re your system’s way of telling you something’s wrong.
Verifying Heat Output
Once the system has been running for a little while, we need to check if it’s actually producing heat. Go to different rooms in the house and feel the air coming from the vents. Is it warm? Is it consistently warm throughout the house, or are some rooms colder than others? We can even use a simple thermometer to check the temperature difference between the air going into the return vent and the air coming out of the supply vent. A good rule of thumb is that the supply air should be about 30-40 degrees Fahrenheit warmer than the return air.
Here’s a quick way to check:
- Turn the thermostat to a temperature higher than the current room temperature.
- Wait for the furnace to cycle on.
- Place a thermometer near a supply vent.
- Measure the temperature of the air coming out.
- Compare this to the room’s ambient temperature.
If the air coming from the vents isn’t noticeably warm, or if there’s a significant temperature difference between rooms, it might mean there’s an issue with the heat exchanger, the blower, or even ductwork problems that are letting the heat escape before it reaches us. This is definitely something we want to address before we’re stuck in the cold.
Wrapping Up
So, we’ve gone over a few things to get your heating system ready for the cold months here in Searcy. Taking these steps now can really make a difference when that first chilly wind blows through. It’s not about being a pro, just about doing a little bit of checking and cleaning. We hope this helps you stay warm and comfortable without any surprises. If anything seems too tricky, remember there are always local pros who can lend a hand. Stay cozy!
Frequently Asked Questions
How often should we get our heating system checked by a pro before winter?
We recommend scheduling a professional check-up for your HVAC system at least once a year. Doing this before the cold weather hits Searcy is ideal, usually in the fall. This helps catch small problems before they become big, expensive issues when you need your heat the most.
Why is changing our air filters so important?
Dirty air filters can really block the air from flowing properly through your system. This makes your heater work harder than it needs to, using more energy and potentially breaking down. We should plan to change or clean our filters every 1-3 months, depending on the type and how much we use our system.
What are some signs that our air ducts might have leaks?
You might notice uneven temperatures in different rooms, higher energy bills, or hear whistling sounds when the heat is on. We can also check for dusty areas around vents or visible gaps and tears in the ductwork itself.
How can we make sure our thermostat is set up for saving energy?
If we have a programmable thermostat, we can set it to lower the temperature when we’re asleep or not home. For smart thermostats, we can use their features to learn our habits and adjust automatically. The goal is to avoid heating an empty house.
What should we do to prepare the outside part of our heating system?
We need to clear away any leaves, branches, or other junk that might have piled up around the outdoor unit. Making sure water can drain away from it is also key. If possible, we can cover it to protect it from heavy snow or ice, but we must ensure it still has airflow.
Is it okay to just turn on our heat to see if it works?
Yes, running your furnace for a short time before it gets really cold is a smart move. We should listen for any strange noises, like grinding or banging, and check if the air coming out of the vents feels warm enough. This gives us a chance to fix any issues early.
